Post variable getting "Work Offset XYZ"

Hi,
image
what are the post variables to get X, Y and Z set in Work Offset XYZ fields within the “Machine Setup” dialog?

For the Clearance Plane the post variable can be easy found in the documentation: z_clearance.
Trying the remaining ones in the Position section I was hoping it is xp, yp and zp, but that isn’t coming true.

Thx for helping me, Harald

Hello @MillingGuy

As far as I know, there are no posting variables to get the values of Work Offset XYZ.

Hi,

hmm… so what are the Work Offset XYZ values good for? I want the machine not to start at workset origin point (x=0,y=0,z=0) but instead the offset given in the “Work Offset XYZ” fields (in picture below the yellow X). Therefore needing useable posting variables to adjust the Post Processor.

Any other idea to achieve this without changing the origin point? This should remain at the position which was defined for the workpiece.

Regards, Harald

@MillingGuy
Here is definition for Work Offset XYZ from our help system.

Regards,

Hi Mo,

OK… cannot follow why this is necessary to set as to get proper machine simulation. Should be so.

Can BC introduce post variables to fetch out those Offset XYZ values?

Regards, Harald

Hey,
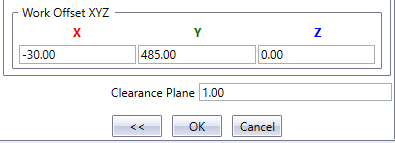
So the work offset value affects the simulation for sure. If for example, say you have the machine setup on the top face of your stock and try to simulate, the stock will be inside the table of the machine. The work offset coordinate is the relation from the machine origin to where the stock should be on the machine in simulation.
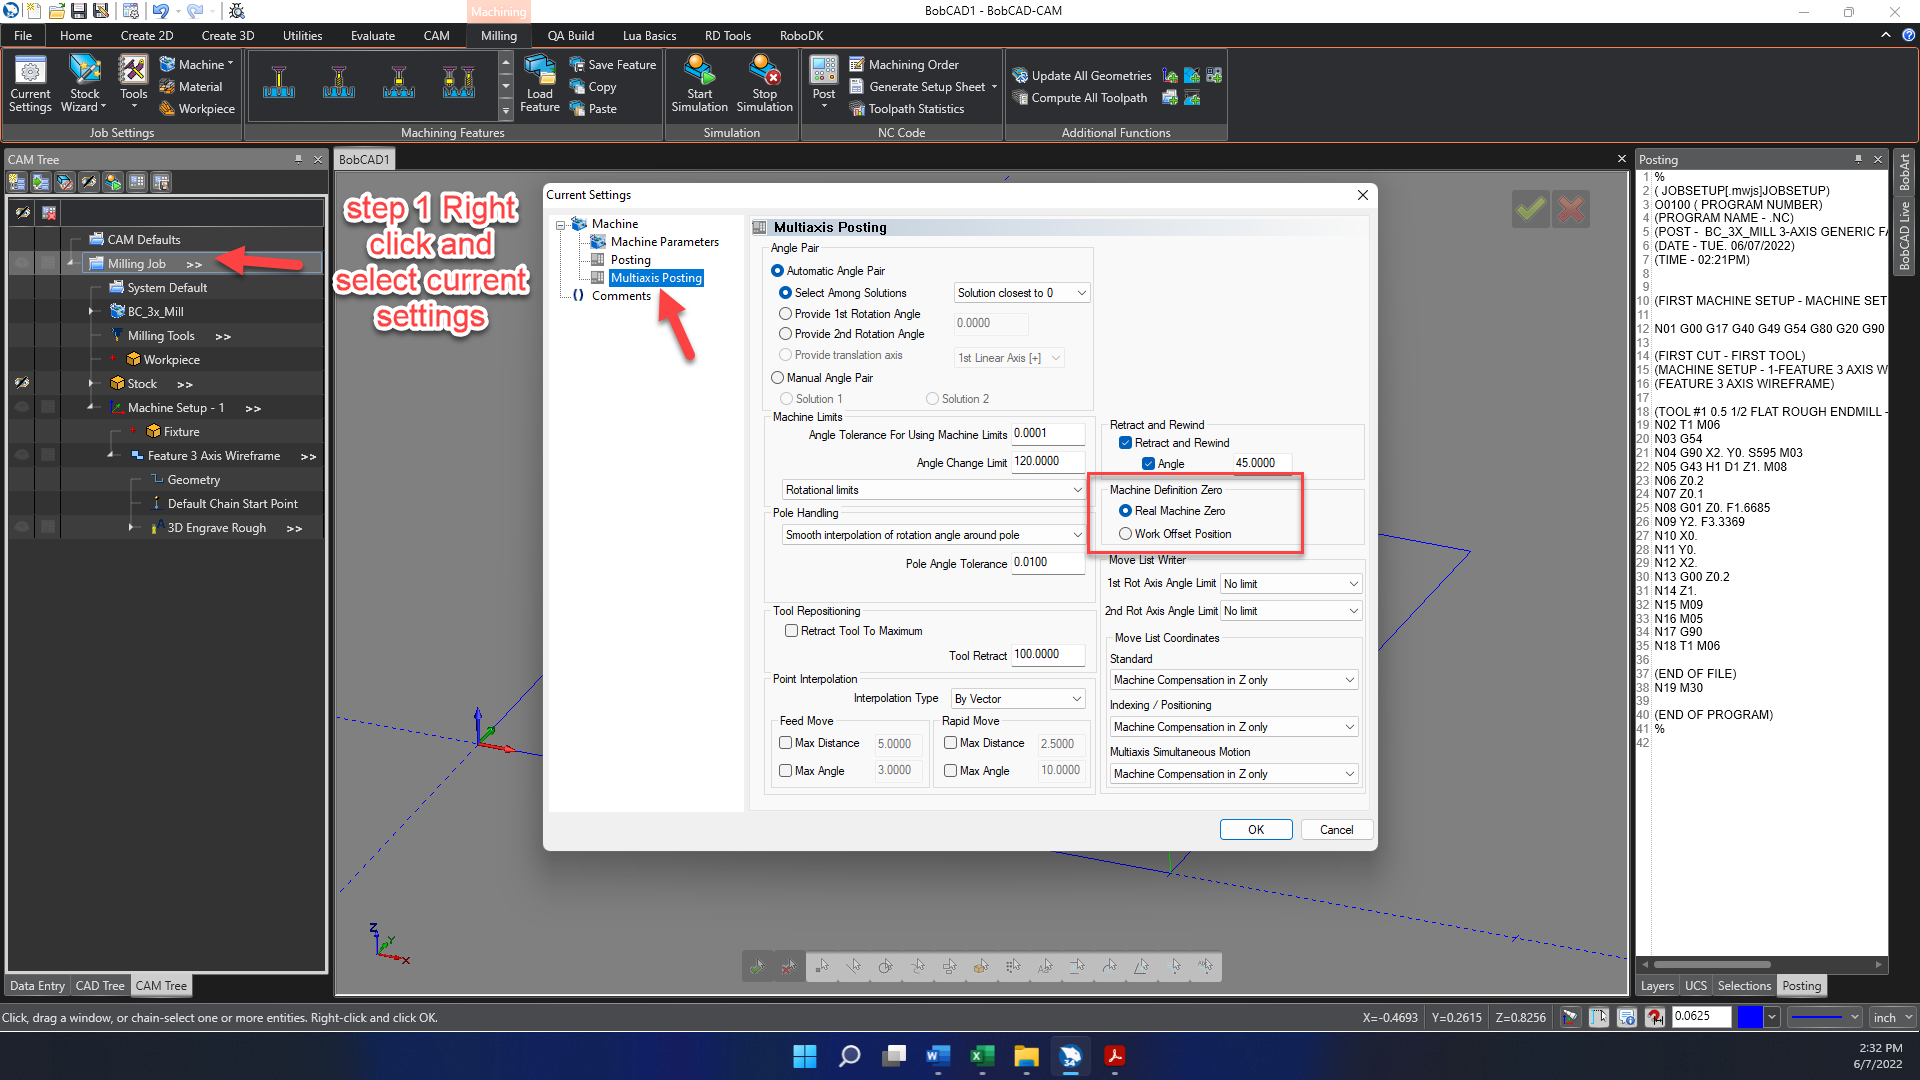
However, there is a option in the Multiaxis posting page which you can get to right click on the job and selecting current settings. You will see on the right side under Machine Definition Zero option to post relative to the Real Machine Zero which is all coordinates are relative to the machine setup location or the Work offset position which when this option is selected, all coordinates are output will be relative to the work offset values specified in the setup page. So the work offset values will be added to the coordinates from the machine setup location

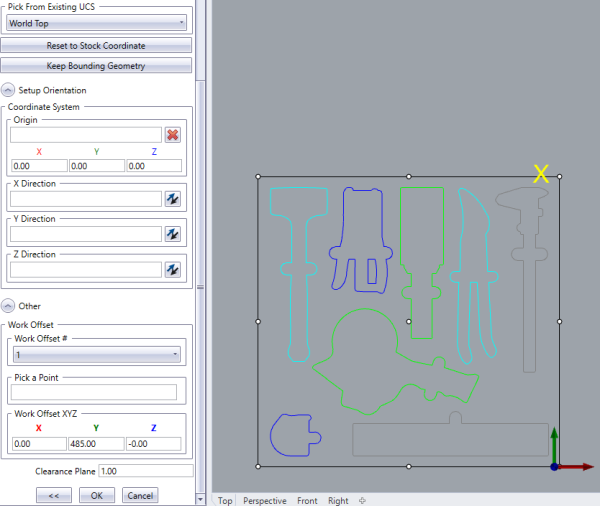
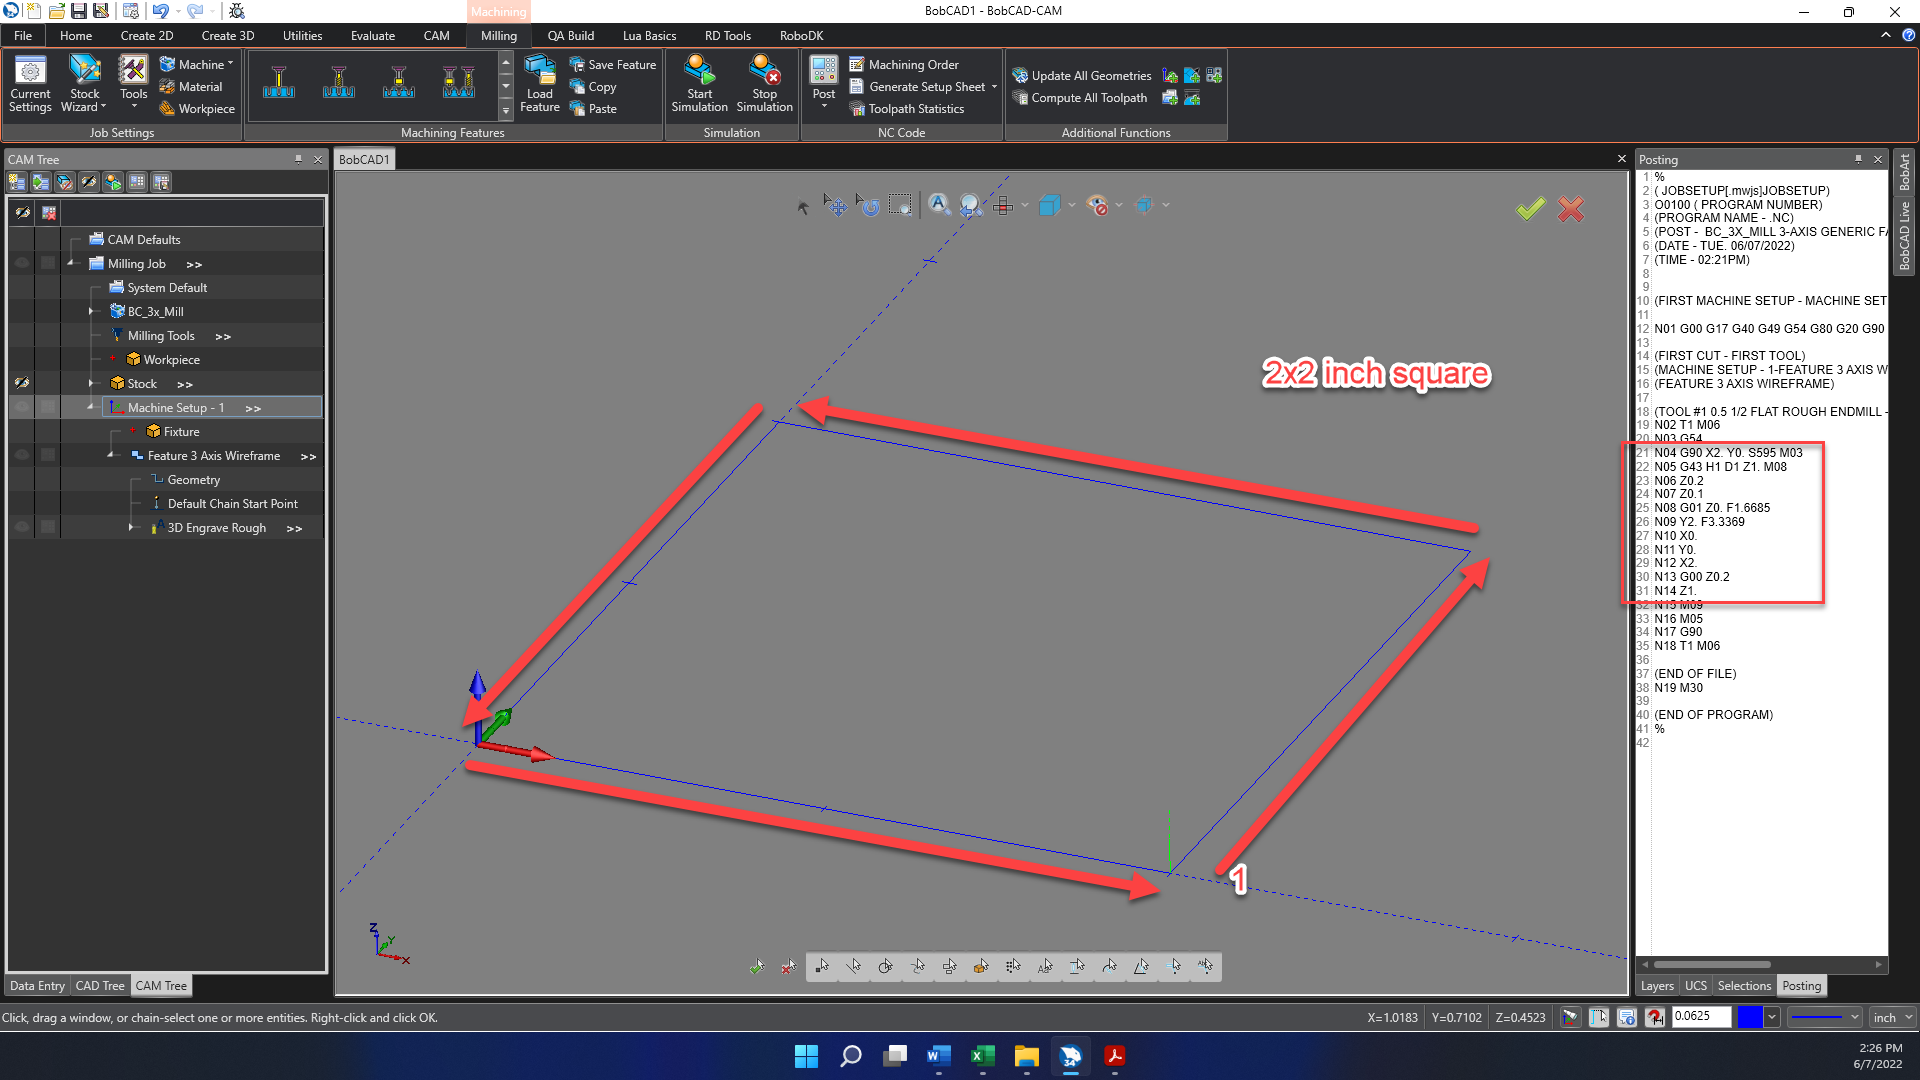
So for example, here below i drew a simple 2x2 inches square and threw in a wireframe toolpath to show off.
here i have the Machine setup defined at the WCS Origin (bottom left corner of the geometry), toolpath starts at the bottom right of the square, direction arrows shows the toolpath i am cutting moving from X2 Y0 to X2 Y2 and so on


This is with the output set to use Real Machine Zero

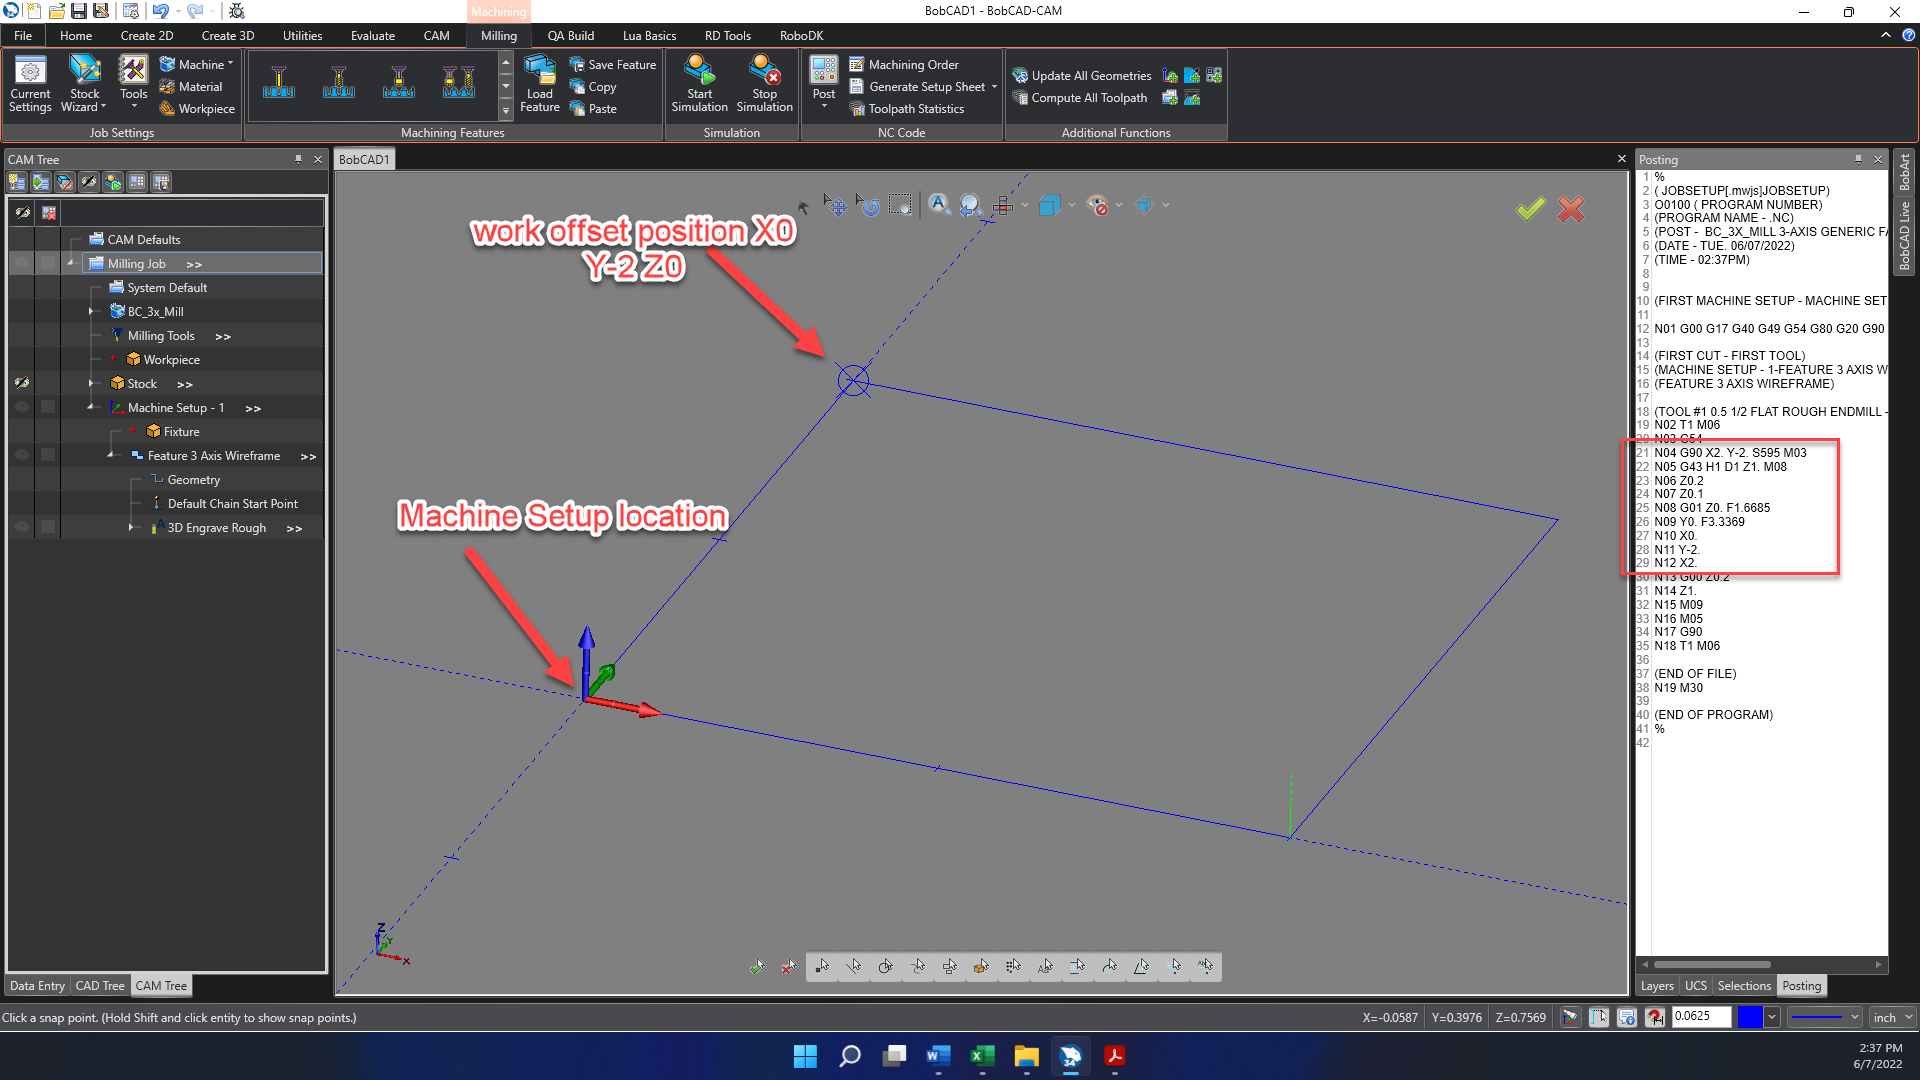
The same toolpath but my work offset coordinate set to the top left of the square and in Multiaxis posting it set to use Work Offset Position, look at my coordinates now, those are now with the work offset values added to the XYZ positions.

is this what you are looking to do?
Dont know why you need that in post processors.

Again keep in mind, these values affect simulation as well as if you set it to work offset position option in Multiaxis posting. So if you add Z value to stick your stock out in simulation and use the work offset position option to output, it will add those Z values too

hope this helps!
Gokul

Hi Gokul,

thanks for your detailed explanation. Since Work Offset affects the simulation, it is therefore not good to use it to solve my original problem.

I am looking for a smart solution, how the machine can be directed to start and stop at user defined x/y/z values (Home Start/Stop Position relative to workpiece zero) instead of moving to workpiece zero. My plan was to change the PP that way, that the WO coordinates are used for it.

In general, you are on the safe side if the machine starts from the workpiece zero point. So PP often start and end with G0 X0 Y0. But this isn’t good, if there is e.g. a clamp sitting on this position. The Home Start/Stop should avoid this. It is also often more practical if the machine moves to a point outside the workpiece after milling, so that it can then be unclamped and clamped more easily.

Perhaps this can be done/solved with workaround using MDI available in V35.

Regards, Harald

You could create an advanced pisting page and set them up there. Look in the documentation and it gives a breakdown of how you can get this done pretty easy.

HTH

Alex